








Select a category

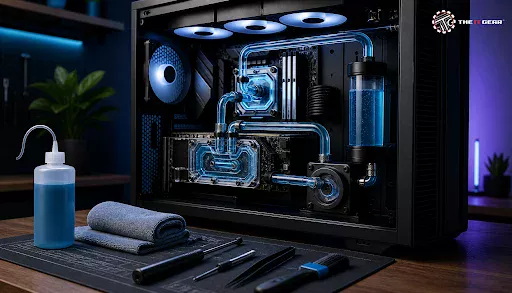
Having a cool water-cooled PC can really be a lot of fun! A water cooled PC can really lower your temperatures a lot, operate much more quietly and allow you to increase the performance of both your CPU and GPU like never before. But in return, you have this regular maintenance thing.
Since it is a complete liquid cooler loop, there's a chance that the temperature might not stay low, there could be some kind of blockage or maybe even some leaks and because of this you need to care for that properly. Here we are going to give you every maintenance step you need to perform to keep your custom loop running just as well as the moment you set it up years from now.
Maintenance of a water cooled PC comprises numerous interrelated steps that are aimed at keeping the coolant loop clean, functional, and free of leaks. In a nutshell, during a maintenance cycle, all components like CPU and GPU water blocks, radiator, and reservoir are cleaned thoroughly and the system is re-filled with the new coolant.
We are not doing that just for fun but because we want to prevent issues like algae growth, metal corrosion, and dust or dirt accumulation which can affect thermal performance besides such things could even potentially damage your highly priced equipment.
The maintenance period is one of those questions that keep owners thinking. For custom water cooled PCs with normal coolant usage, the industry's suggestion is that everyone should stick to replacing the full coolant and doing a visual inspection every 6 to 12 months. The reason is that no matter how good a coolant may be, the anti-corrosive and bacteria-inhibiting qualities will wear off as time goes by. Once in your block, algae or other deposits have a tendency of not only hampering thermal efficiency but even plugging up fine heat fins.
Some variables can shift this maintenance timeline one way or another. If the coolant is made up purely of distilled water with a biocide, the coolant will probably get used up more often so you might need a more frequent replacement of it at 6 months intervals.
Conversely, the use of opaque or pastel coolants of high quality may keep them usable close to the 12-month mark but they have a higher chance of causing stains or separation of particles. Also, you should carry out a brief check regularly for the coolant's transparency and the color every few months. Should you realize that it is cloudy, discolored or particles are floating in it, that is a sure signal that the whole system would be better off getting a full service right away rather than delaying it unnecessarily.
The methodical process of liquid cooling system clean-up should be followed so not only will the appearance of your cooling system be good, this also prevents thermal hotspots from developing and helps your cooling system perform up to par. One of the biggest mistakes would be to underestimate the role of cleaning the cooling parts as even an insignificant particle buildup will cause a noticeable rise in your cooling system temperatures by upwards of 10-15°C in some cases.
As preparation is a vital part of the whole endeavor, make sure that you have all necessary tools handy: for example, soft brush (like an old tooth brush), lint-free towel, container for holding drained cooling liquid, and screw driver. You are expected not only to remove old coolant but also, more importantly, to get rid of all the biological or particulate deposits that have been left during the previous coolant life cycle.
This is an outline of the cleaning procedure which you can refer to for more detailed instructions about the various steps.

Draining the Cooling Liquid from the System and Rinsing the Cooling Circuit
The initial step is to safely drain old or left over coolant from the system. Many customized cooling circuits have a single drain port situated at the lowest section of the cooling liquid pathway. Turn on this drain port and allow the fluid exiting to be captured in a suitable container.
On a no drain valve installation, a tube has to be opened at the lowest point as an extra care for not causing spillages. Once it is drained, you can do the loop flushing. To achieve loop flushing you basically want to get rid of all the loose bits of material and any remnants of old coolant. Fill the reservoir with distilled water and set the pump (with the use of just the power supply) running for approximately 3-5 minutes.
The idea is to clean out the coolant passage, then empty this water off. Repeat the procedure 2-3 times up to the point when what comes out is crystal clear water. It would leave no contaminants to your new coolant in the least bit.
Sanitizing the CPU and GPU Water Blocks
You should be most careful about the cleaning process on water blocks (CPU and GPU water blocks are mainly sensitive to dirt and deposits). As it turns out the blocks have what is called a "cold plate" with very minuscule micro-channels and they really don't stand a chance against blockages. You'll have to disconnect such parts and then undo the top piece from the base piece of the block after having unfastened it.
After dismantling, gently brush away debris on the micro-channels surface with a soft brush (like the end of a tooth brush) dipped into some warm distilled water. Besides, you also may wish to give the acrylic top a once-over. Remember not to get the acrylic part wet as it can crack or turn cloudy.
After the scrubbing is done carefully rinse the parts off with tap water and then dry them thoroughly using a clean dry cloth. You might consider the time you set aside to clean the cooling system as a good occasion also to update the thermal paste of your CPU and GPU.
Cleaning the Radiator and Reservoir
The radiator is essentially your entire heat pipe. As time goes by, it gathers bits of debris and even worse, its narrow openings get stuck with dust, preventing the air from passing through. To clean the inside of the radiator, flush the water through separately with distilled (i.e. pure) water first. If you face a very tough and deep layer of grime, go for a dedicated radiator cleaner, which is designed to deal with such situations.
On the outer side, use pressurized air, which is basically regular air under pressure so you can blow away any kind of particles, or at least, blow off the dirt and dust from its narrow parts. Alternatively, you could utilize a very soft brush to remove the dust.
You will hardly ever have a difficult time cleaning the reservoir. First of all, you will have to take it off from the main part of your looped system and take its internal parts apart, in a proper and safe way. To do a really thorough job, use a small, soft sponge, plus warm water, to clean the inner surface of the reservoir.
Be very meticulous not to leave behind any traces of coolant dye or even the smallest of algae growth on the sides of the tank. After thoroughly rinsing with clean water, make sure that you let the tank dry completely before assembling. A perfectly clean reservoir not only is a pleasing visual element in your room but is really handy for you to monitor the condition and quality level of your coolant at a later date.
The main part of this maintenance job is major biannual cleaning and this does not even require dismantling the system entirely. The rest of your maintenance tasks are rather little, small-scale, things done regularly, like the small changes to the water that are needed to get a longer life and better performance of the PC. These are little wins that prevent the system from slowing down or even breaking down without the need for extensive repairs, and you don't even need to do a teardown for that.
To keep you updated with water cooled PC maintenance, below is a short list with all the major issues highlighted:
Keeping a water cooled PC in a top shape is really one of the important tasks required from every custom loop owner. Still, if you make a strict plan of coolant swapping, component cleaning and system checking, besides that, if you also use good software for CPU/GPU temperature monitoring, you will keep the high-performance rig of yours running quietly at maximum efficiency without any interruption at least for quite a long time.
Though, it is quite a big task to learn all the details first, once you figure it out, water cooling maintenance will be the easiest way for both the satisfaction that this hobby gives and the care required to keep the computer running smoothly. When your next maintenance service comes around, if you feel that you need to have professional help with component sourcing and fluids, just remember that The IT Gear is ready to support you with any water cooling PC issue!

Q1: Do you need to change the water in a liquid cooling PC?
It's definitely one of the steps that shouldn't be missed. The coolant in a liquid cooling pc will get dirty over time and start to be the reason for the growth of various microorganisms besides rust. If you do not flush, replace and filter it properly on a regular basis you are going to end up with problems and, at the very least the system performance will be affected. The best way is to do it once every six or so months to make sure your cooling system is at peak efficiency without getting clogged with the dirt of the coolant.
Q2: What is the lifespan of a water cooled PC?
In essence, the PC is unaffected by the method of cooling. Still, the water cooling circuit parts like a pump, fittings and tubing are going to wear out and require replacing and the life of a pump can be extended with proper and frequent maintenance to 5-7 years. Meanwhile, tubes and other fittings should be replaced at intervals of 2-3 years. So you can see, your cooling setup is really a big investment which pays off if only it is taken good care of.
Q3: How to check a water cooling PC for problems?
Maintaining the water cooled PC needs checking it for problems on a regular basis which means doing a visual check for dirt and leaks but mainly relying on the software to inform you about the pump speed and temperature level of your components. Usually, a sharp rise of CPU/GPU temperatures is quite telling of a major problem with cooling.
Q4: Does water cooling improve CPU performance?
Yes, in an indirect manner allowing the CPU to run at lower temperatures than the ambient which is an obvious way for keeping it from thermal throttling that happens when it has to cool itself by reducing the speed. Also, more stability in overclocking means the possibility to push your performance further and that's quite a nice bonus.
Q5: How to maximize PC cooling with a water loop?
To get the maximum from the cooling system your machine has besides keeping the radiator and its fans clean to ensure airflow is unobstructed, you would also need a fast, highly turbulent coolant which is capable of carrying heat away from the components most effectively. Foremost, make sure that your water block is in perfect contact with your CPU/GPU by using the appropriate amount of high-quality thermal paste.





#No. 9, 5th Floor, Max City Center, T. P Lane, Sadar Patrappa Road, Bengaluru - 560002 (Karnataka)