








Select a category

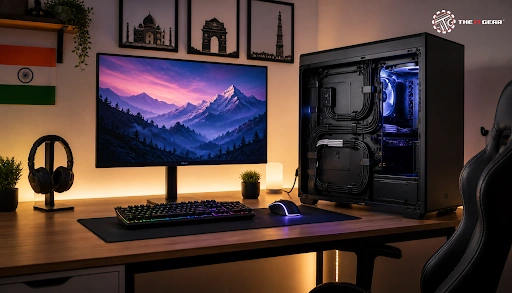
Your clean gaming PC is a mark of honor if you're enthusiastic about PCs. Behind the beautifully organized workspace usually lies the mess of a tangled mess of wires that not only looks un-aesthetic, but can also disrupt your gaming experience.
In urban India where the space can be limited, it's essential that the cable management is done efficiently so as to keep your PC gear not only protected from damage but to be also out of a dust-prone environment. Through this guide, you will gain a better understanding of gaming PC cable management, from easy methods right up to the professional tools, all suited for an Indian gamer.
Finding, organizing and hiding computer gaming devices and other accessories that are the source for countless cables in your home computer system is a very important thing to get done. The end result should look clean, tidy, and even professional and should work as the perfect place for your work.
Besides aesthetics, good cable management has a lot of real advantages:

You don't need to call in a fairy godmother if you happen to be aiming at a clean setup. You have to go for a logical way of thinking and a step by step approach as well. These are the steps to take if you would like the result to look really professional.
Step 1: Examine Your Current Setup And Draft Your Cable Layout
If your current setup isn't the least bit neat, just give it a good look. You will have to locate every single device as well as the cables they are running through. Also consider where every piece device ought to be placed and make a plan for the route of each cable. A well thought out plan and proper implementation are the two most important things if you are out to succeed in the cable management business.
Step 2: Remove All Connections, Separate Cables, And Throw Away Clutter
Cease all the power lines. This is your opportunity to have a "blank slate" to start with. Cables could be categorized based on type as power cables, TV cables, USB cables, and headphones. Eliminate all extra stuff if you really want. Are you sure you still need an old USB hub or charging cable for a piece of equipment you stopped using? The rule of thumb is: if it can't be used or it's not useful, its place is not on your desk.
Step 3: Plan Your Cable Routes
Facing your desk and placing the computers on it, the idea for each wire is to come straight from the source at the same level. Usually, the best way is the back edge of the desk, behind the desk legs, or simply a cable management tray where you can plug in the cable. As for the cables leading from the motherboard to the power supply on the floor, think of an area or two to use only that.
Step 4: Use the Right Tool for Bundling and Securing
This is the part which makes cable management really neat. Rather than buying cheap zip ties that might pinch and damage your cables, go for Velcro ties. They are not only reusable and can be adjusted as needed, but they'll also not harm the cables. As one way to look more tidy, group your cables together, like your monitor's power and display cable, in one single cable sleeve or wire loom if you want a super clean look. By doing this, a single "neatline" is formed which resembles a thick cable.
Step 5: Secure with Clips and Holders
In order for your individual cables not to fall down or be in a disarray, make use of adhesive cable clips. On the bulky groups, you will want a cable raceway or J-channel, which gets attached to the underside so that they can be fully concealed. It's really a "once and forget" solution which makes sure everything will stay in the air and be out of sight.
Step 6: Hide Spare Cable Length
This issue usually occurs all the time. Do not let your cables hang around in a messy way. Take the liberty of a cable management box or an under-desk tray to tuck your power supply and all your extra cables behind the scenes. By taking this step, your room would immediately change its look with the most noticeable detail.
Step 7: Cable Labeling
What you do here is help your future self. Either get a label maker and make small labels or use masking tape to label both ends of each cable, (e.g. "Monitor Power," "PC USB"). The moment you need to get another GPU or you are forced to move the desk around, it would be the best moment to remember that you just did a minor organisational move.
Step 8: Final Test
Put all of your equipment back together and check if everything continues to work properly. Verify that your screens are working right, the peripherals responding to your commands and the PC being silent enough. Good cable management will not hinder your usage of the computer. Instead, it should make things much easier.
To be able to have a clean setup, get yourself the right equipment which is necessary for a gaming PC wire management. Here are your top tools for gaming pc wire management.
Once you are through, this quick checklist will help you find out if you missed anything.
1. Declutter: Removed all unnecessary cables and peripherals.
2. Plan: Mapped out a clear route for every remaining cable.
3. Bundle: Grouped related cables using Velcro ties or sleeves.
4. Conceal: Used a cable management box or under-desk tray to hide the power strip and excess length.
5. Secure: Used clips or raceways to keep cables flush against the desk or wall.
6. Label: Identified both ends of each cable for future ease.
7. Test: Verified that all devices are working perfectly.

No matter what kind of gaming experience you want, a clutter-free and clean gaming desk can easily be the outcome of the budget and space conditions for Indian gamers, if you take up this step-by-step and thorough process and buy a few must-have gadgets like Velcro ties, a cable management box, and adhesive clips.
Plus its visually impressive and organized appearance, it is going to allow for better cooling by enhancing ventilation, save on cleaning time, and protect your equipment by minimizing dust accumulation and damage. Begin the cable management work right away so that your games are enjoyed in a much more comfortable environment of a well-maintained desk.
How to manage cables for a gaming setup?
Clean up everything unplugged and separate the cables. Determine how the path should be made for each wire and make sure all is done with the Velcro ties. To route the excess the clip is used on the desk surface whereas the cable management box or tray under the desk is where the power strip and the long part of the cable would go.
How do you increase the cleanliness of your gaming setup?
A key step is to remove all superfluous items from your workspace. That means leaving nothing but the things which perform functions for you - like the old cables, unused mouse and keyboard combos. Clean off the surface you work on. That will make it like you are working on a white canvas. After that, use a system of cable management that will keep wires hidden and organized in an aesthetically pleasing way.
How do you make wires clean?
Velcro is one of the ways a user could organize his/her workflow: 1) Pull out all electric stuff. 2) Tuck long cables through the coil and tie them together. 3) Sort with color-coded ties. 4) Place the power strip under the desk. 5) Put together the cables and label both ends. That will make the maintenance easier in the future.
What is the most useful cable management idea for a gaming PC?
The idea that you must do at first is, after you have decided the layout, to make sure that every device can be located on their spots, and the path of their cables is plotted out correctly. Doing this will make the untidiness created at one spot by the tangles of new cables while trying to sort out old ones much less likely. What it means is that you are going to have the outcome of your hard work to be both spotless and visually stunning right from the beginning.
Is it mandatory or even recommended to have a cable management box?
Even if it's not something that one absolutely has to get into possession of, a cable management box is the one thing that you could have been a part of with very little effort. It hides your power strip that you have put there for the backup power, the thick power adapters and the cable leftovers in one go which is definitely the fastest way to bring the overall desk setup of you into the state of a perfect cleanliness. Weighing all of this against that, it's a very small investment of the funds that will bring the visual appearance of your whole place up by many levels with absolutely no effort.





#No. 9, 5th Floor, Max City Center, T. P Lane, Sadar Patrappa Road, Bengaluru - 560002 (Karnataka)